I am revisiting the Dresden Fan Coaster from last year. I felt that it wasn't necessarily the best directions if someone wanted to duplicate it. I also love making picture collages, so this gave me the opportunity to do that!
I was unhappy with the one that I did a year ago, mostly because of the binding. I am still greatly dissatisfied with the binding of the new one as well, but I tried something different and it did not work. And then I found a great tutorial for binding over at Jaybirds Quilts. I used that to attempt to fix my mistakes, but I am just going to have to go through and make another one! :)
So here is my process behind the coaster so you can do it too! :) I do not have pictures of cutting with the Dresden template, but I do walk through creating the pointed tip.
Dresden Fan Coaster
1. I cut a piece of fabric 5"x5" and sandwiched it with backing and batting.
2. I cut out (5) 3" pieces using the Dresden wheel, each a different fabric and picked out my coordinating circle piece.
3. Fold your Dresden piece in half, the long way and right sides together. Sew the larger end at a 1/4". I liked to chain sew all of these pieces. It makes it go by so much faster!
4. Cut the corner on the FOLDED side to make it less bulky when pushing it right side out. Be sure NOT to cut on the seam at all or else you would get a hole.
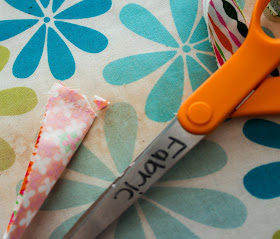
5. Push the sewed tip right side out and use the tool that either comes with the template, or a blunt object. I used the cap to my seam ripper. Then press!
6. I place my first Dresden petal/blade on the sandwich piece right side up. I put the tip about a little more than 1/2" from the edge and the side about a 1/8"-1/4" from the edge. I pin this one in place. Place another blade right sides together on top of the previous one. I don't pin this one down, but you could pin here instead of the first one.
7. Draw a line 1/4" from the edge of the blade on the inside of the coaster from edge to edge of the sandwich. You can use a marking pen, but I just use a pencil. Sew down that line then press open.
8. Continue through the rest of your pieces.
9. Using a template for the circle, I only cut out a little bit bigger than a quarter of the circle. I used the template from the Craftsy Block of the Month last year (July 2012). I am working on trying to get the template up, but right now my scanner is not working.
I cut the quarter circle using the corner of the fabric. Fold the fabric in half so that way you are cutting both pieces at once. Then sew, right sides together, along the curved edge.
I cut the quarter circle using the corner of the fabric. Fold the fabric in half so that way you are cutting both pieces at once. Then sew, right sides together, along the curved edge.
Cut slits into the seam allowance, be sure not to cut the seam. Turn right side out and press!
10. Place the quarter circle on the coaster and position to where you want it to be and pin. Using either a straight stitch or zig-zag, stitch in place along the curved edge.
11. Sew along the tips of the fan using the same stitch as the circle.
12. Trim and bind your coaster and there you have it! A cute little coaster that looks cute anywhere!


No comments:
Post a Comment
Thank you so much for taking the time to read my little blog blurbs, and thanks doubly for taking the time to make a comment!
I try to comment back, so if you don't have an email, either leave it here or check back later! :)