Pages

Wednesday, April 29, 2015

Time to Travel Blog Tour {Sewing With Boys' E-Book: Review}

I am super excited that I get to share with you this e-book by a group of fellow bloggers, Sewing With Boys, called Time To Travel!


The book is pretty awesome, and perfect for the upcoming summer vacationing season where a lot of us go out and travel! So many great things from suggestions of fellow mommies, activities to do with the kids, patterns to sew.  I love it!


Just Like Papa Briefcase


Perfect with the spot for coloring utensils, pockets for toys, spots for coloring/working pages. so fun! and great for in the go to a restaurant, plane or car ride! (all of which we will be doing this summer, score!)


fabrics used
I repurposed dad's jean denim, hand me down quilting cotton. The only thing I had to buy was the zippers! I'm super stoked about that! Airplanes seem appropriate for it's purpose


modifications:
I used a stabilizer for the main/outer fabric to make it a little more firmer and add some strength to worn out jeans! I used Craft Fuse 808, as I always have some of this on hand (or the 809, but that's the same thing anyway just wider).


embelishments:
re-used one of the back pockets on the front. It holds the wallet perfectly!


The pattern
no need to be intimidated! It really was fantastic to put together, and the directions take you step-by-step! You would be so proud once it is complete! a perfect carrying case for any boy (or girl, I may need to make one for baby girl now!)
You can either cut by pattern pieces or use provided measurements. In this case, of the repurposed pants, I used the pattern pieces. But with yardage, it would be so easy to cut by measurements!

Ready Set Go Wallet


Seriously, they must have been reading my mind of what my son needed, and a wallet all his own was exactly the thing! 

Fabric used: Recycled daddy jeans, left over yardage, same as the briefcase! perfect combo!


Modifications:
none!

Embelishments: none

It's so great to use for play! I didn't get any pictures, but he used it for it's intended purpose! We put his commission money from chores in it and went to the store to make a purchase! He was telling everyone his mom made his wallet. :D Proud momma right here!

The Pattern: A great and fast sew, easy to follow directions. I love the use of the bias tape, especially around the curved edge!

Printables

We used the airplane ticket, drivers license and money to play, pretend and prepare for our future plane ride we will be taking in June and our driving trip in July! I'm getting spoiled this summer. It will be almost 3 years since our last vacation and here we are getting 2! Yay! but honestly, it was so hard to take picture because, well, I had to be the airplane pilot. Little man, and "definitely not" baby girl were too young to drive an airplane apparently... LOL!

Mom the ticket taker... "all aboard!"
practicing getting on a plane is so much fun!

Carry on goes under the seat...

Getting ready to take off and watching mom bounce to the turbulence... he was just amused! Ha!
Pretend store for gas, food, and other things is a great life skill! Yay life skill! we practiced counting by 5's and 10's too.... So many uses!


I also printed the lacing cards. We have been using lacing cards when we do preschool and Little man is so proud of himself when he finished one! Coloring though is so labor intensive for him. So I colored them myself.


As soon as he saw the belt, little man has been requesting it as a "batman belt!" perhaps birthday? 

Best part? It gave me some other ideas too for our trips that I will be sharing with you later ;) Probaby would not have if it weren't for the articles and travel tips in the e-book!

And now? the e-book is on sale for the duration of the tour!
It is 30% off during the tour and already marked down.
Buy on our site: http://sewingwithboys.com/time-to-travel-ebook/Etsy: https://www.etsy.com/listing/230096393/time-to-travel-ebook?ref=shop_home_active_1

We all love Giveaways!!!

"Grand prize: $50 gift certificate to FabricWorm and a copy of Time to Travel*
2nd: 1 yard of fabric from Mabel Madison and a copy of Time to Travel*
3rd: a copy of Time to Travel*
*If you buy the eBook and win the giveaway, we will either refund your money, or send the copy on to a friend of your choice.
But that's not all! If you buy the eBook during the tour, you'll be automatically entered to win a $30 gift certificate to Fat Quarter Shop!"
a Rafflecopter giveaway

Don't forget to check out these other awesome ladies and what they created from the e-book and the patterns that are included!

April 20: Rachel at Once Upon A Sewing Machine || Michelle at Falafel and the Bee
April 21: Becca at Free Notion || Heather at All Things Katy!
April 22: Chelsea at GYCT Designs || Ula at Lulu & Celeste
April 23: Stephanie at Swoodson Says || Sherri at Thread Riding Hood
April 24: Meriel at Create3.5 || Sara at Made by Sara
April 27: Melissa at Oh Sew Boy! || Stacey at Boy, Oh Boy, Oh Boy Crafts
April 28: Teri at Climbing the Willow || Ajaire at Call Ajaire
April 29: Jessica at The Berry Bunch || Dana at Sew Thrifty
April 30: Stacey at From-a-Box || Maegen at Mae & K
May 1: Kelly at Handmade Boy || Roxanne at Pen, Seb & Rox

and some more pictures... ( the bag and wallet have not left him these last few days!) I can't wait to do the treasure map printed on paper. Really, there is so much in the e-book, you really need to check it out! :)

 http://sewingwithboys.com/time-to-travel-ebook/Etsy: https://www.etsy.com/listing/230096393/time-to-travel-ebook?ref=shop_home_active_1


Monday, April 27, 2015

GYCT Designs: Rival Raglan as Swimwear! {Monthly Monday Madness Sale}

*This post contains affiliate links. I recieve a small commission only if you make a purchase at no extra cost to you. All views expressed are my own.*

The Berry Bunch: GYCT Designs: Rival Raglan as Swimwear! {Monthly Monday Madness Sale}

I love sewing up raglan style shirts. They are so easy and so fun! No set in sleeves and curves to have to fight and ease in. Though that isn't so bad, sometimes it's nice to have the instant gratification of a super quick sew. And a Raglan, especially the Rival Raglan by GYCT Designs (affiliate link), is perfect for that. I tested the pattern when it was first released and little man loved it so much! I also used it in a gift for a friend's baby using a stencil and some free hand work on it. And, lots of other shirts that I just haven't photographed to share! But these are special!

The Berry Bunch: GYCT Designs: Rival Raglan as Swimwear! {Monthly Monday Madness Sale}

I used swim fabric to create some long sleeved swim shirts for the kids! They love their new swim shirts!

The Berry Bunch: GYCT Designs: Rival Raglan as Swimwear! {Monthly Monday Madness Sale}


We are going to Maryland in June and the kids have the opportunity to go swimming at the beach! I have never been swimming at an East Coast beach other than in Florida. And I was so little I haven't the clue or remember, was it the Golf or the Atlantic? What I do remember is the beaches in California. Brrr... Especially the last time we were at a beach 4 years before we will be in MD, it was northern Cali... double Brrr....

The Berry Bunch: GYCT Designs: Rival Raglan as Swimwear! {Monthly Monday Madness Sale}


So I sewed up the kids some long sleeved ones in case they were cold and I forgot to didn't downsize (for the 4-way stretch)... You know, in case they get bigger before June. But I would recommend going down a size if you were to sew one up in swim fabric. ;)

Little man's modifications: none....

The Berry Bunch: GYCT Designs: Rival Raglan as Swimwear! {Monthly Monday Madness Sale}

except that he won't let me take it back to hem the sleeves and bottom. It will have to get it snuck away when he isn't hoarding it, in order to do so.

Embellishments for both:

The Berry Bunch: GYCT Designs: Rival Raglan as Swimwear! {Monthly Monday Madness Sale}

topstitch the sleeve seam allowance down.

The Berry Bunch: GYCT Designs: Rival Raglan as Swimwear! {Monthly Monday Madness Sale}


Baby girl's modifications:

Cuffed the end of the sleeves. Cut the neck binding at 2.5" instead of 2"... The slippery bugger of a fabric shifted under the ruler, but I love the look it gave!

The Berry Bunch: GYCT Designs: Rival Raglan as Swimwear! {Monthly Monday Madness Sale}

Added a waistband.

The Berry Bunch: GYCT Designs: Rival Raglan as Swimwear! {Monthly Monday Madness Sale}


It was great to play with the water and splash outside the pool... We got some crazy cooler weather (don't get me wrong, it's nice) and going into the pool is just not going to happen!

The Berry Bunch: GYCT Designs: Rival Raglan as Swimwear! {Monthly Monday Madness Sale}

The Pattern:

Today (4/27) is the discounted sale of the Rival Raglan by GYCT Designs (affiliate link), so it's the perfect time to pick it up!

The pattern itself has a size range from 12 months to 12, and comes in lengths for shirt, tunic, and a dress option for the little ladies! There are 3 sleeve lengths: short, 3/4, and long, with included directions on layering the sleeves! I seriously love the layered sleeve look!

The Berry Bunch: GYCT Designs: Rival Raglan as Swimwear! {Monthly Monday Madness Sale}

The kids enjoyed even lounging. Whats not to love about lounging in swimwear?

The Berry Bunch: GYCT Designs: Rival Raglan as Swimwear! {Monthly Monday Madness Sale}

One of my favorite things about GYCT Designs (affiliate link) is the versatility of their patterns; they look great as is, modified or embellished, made from yardage or upcycled clothing... This one is a serious staple in my kids' wardrobe (along with their Tinley Tee (affiliate))...

I just can't get over my kids in their cuteness as they run around the house in their Rival Raglan by GYCT Designs (affiliate link) swim shirts.... Could it be possible that I love the pattern even more?!?

The Berry Bunch: GYCT Designs: Rival Raglan as Swimwear! {Monthly Monday Madness Sale}

The Berry Bunch: GYCT Designs: Rival Raglan as Swimwear! {Monthly Monday Madness Sale}

Happy Sewing!

Monday, April 20, 2015

Tea Party Dress: GYCT Designs Firecracker

*This post contains affiliate links. I receive a small compentsation only if you make a purchase, and at no extra cost to you. All views expressed are my own.*

I cannot believe I had not sewn up the Firecracker Dress (affiliate link) before the sew along with GYCT Designs (affiliate)! I love it!

The Berry Bunch: Tea Party Dress: GYCT Designs Firecracker

When I was planning the fabric I thought about Alice in Wonderland and thought it would be cute using this dress. We had Tea and Testimony with the local MOPS group and I had wanted to have it finished by then, but no luck since I wanted to finish the printed 'Be You, Bravely' mug rugs first!

But, we had a birthday party that Saturday, and it was the perfect opportunity for a dress. Party worthy.

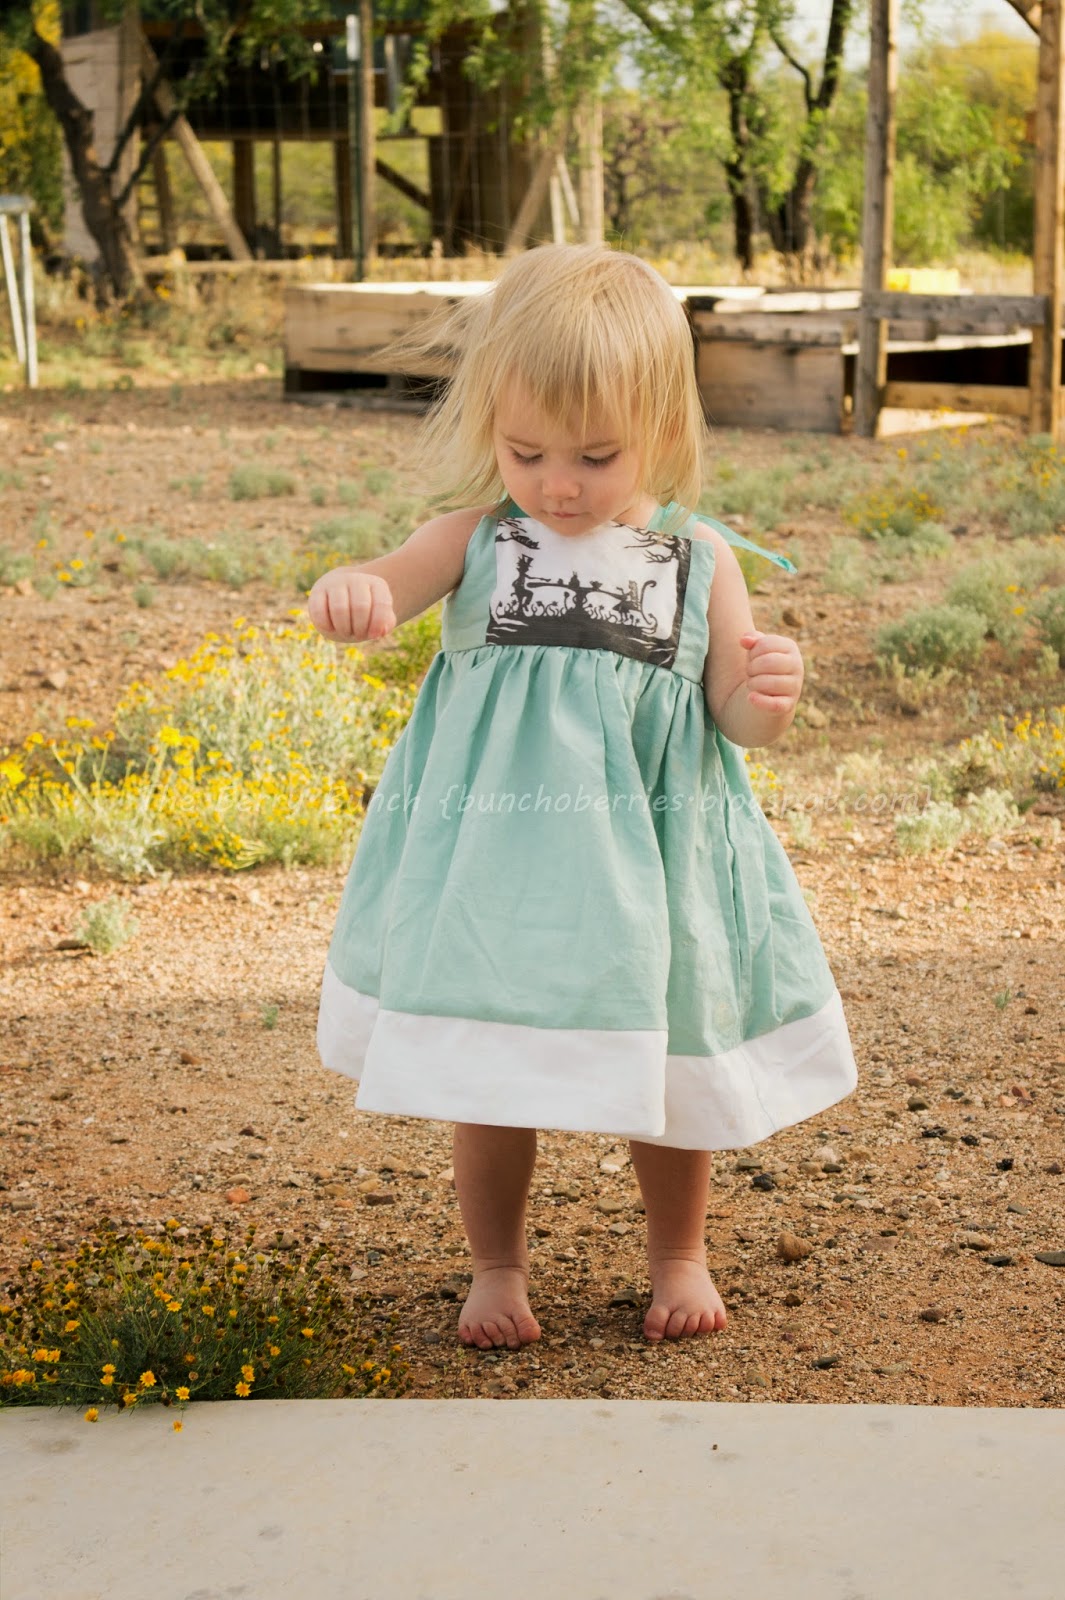
Baby girl in her Firecracker Dress by GYCT Designs (affiliate) size 12-24 mos. It is slightly big, but it should last her until we get our 'winter'.

The Berry Bunch: Tea Party Dress: GYCT Designs Firecracker

Embellishments:

The Berry Bunch: Tea Party Dress: GYCT Designs Firecracker

I printed out images on the front and back panel instead of using a solid or patterned fabric to create the theme and add interest. I used the same method for printing on fabric as I had on the printed mug rugs.

The Berry Bunch: Tea Party Dress: GYCT Designs Firecracker
Modifications:

The Berry Bunch: Tea Party Dress: GYCT Designs Firecracker

Instead of using fabric for the straps I used a coordinating sheer ribbon with finished ends.

The Berry Bunch: Tea Party Dress: GYCT Designs Firecracker

I used the sew along tutorials for a banded hem and more traditional straps. The pattern has the straps extend the length of the bodice on the outside, which is super cute and I am thinking of making a 4th of July top as the pattern is directed.

The Berry Bunch: Tea Party Dress: GYCT Designs Firecracker

I cut at the tunic length before adding the banded hem, then cut the banded hem to allow for the extra length I wanted. She is still pretty tiny so it works perfectly for her.

The Berry Bunch: Tea Party Dress: GYCT Designs Firecracker

I am already planning another dress using this pattern. Granted, sewing time is limited so hopefully, I will have time to complete it before the 4th of July! 

The Berry Bunch: Tea Party Dress: GYCT Designs Firecracker
Can you spot the Cheshire Cat? ;)
The Pattern:
The Firecracker Dress by GYCT Designs (affiliate) come with sizes ranging from 3 months to 12. It has great directions, simple to construct and incredible tips from the sew along for beginners to reference!  GYCT Designs (through the sew along) even offers a video tutorial for how to hand stitch the bodice lining!

Head over and check out The Firecracker Dress by GYCT Designs (affiliate)!

Happy Sewing!
linking up

CraftingCon

Wednesday, April 15, 2015

Tiger Tail Tutorial: GYCT Design's Make Believe Week

Welcome to my stop on the Make Believe Week with GYCT Designs! 


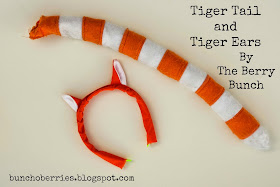
Several months ago I had a friend send me a message asking for a tiger tail. Not anything super specific, but just to play around Daniel Tiger style, an luckily at my leisure without a deadline. Then GYCT Designs came out with this neat series, I saw it as the perfect opportunity to work out the snap on (or you can use velcro) Tiger Tail! And, I made a matching set of Tiger Ears to go with the tail! Check out the other awesome Amazing projects from today over at GYCT Designs!

The Berry Bunch: Tiger Tail Tutorial: GYCT Design's Make Believe Week

Such a fun set! Little man likes it. Actually, he hasn't taken it off for 2 days.

The Berry Bunch: Tiger Tail Tutorial: GYCT Design's Make Believe Week

The Berry Bunch: Tiger Tail Tutorial: GYCT Design's Make Believe Week

The ears a just a strip of fabric covering a headband. Large enough to slide the headband in and out of the tube.
The Berry Bunch: Tiger Tail Tutorial: GYCT Design's Make Believe Week

The Berry Bunch: Tiger Tail Tutorial: GYCT Design's Make Believe Week

The tail was initially going to be the only thing I made. But it seemed to need the ears. It is made from felt, poly-fil and snaps. 

The Berry Bunch: Tiger Tail Tutorial: GYCT Design's Make Believe Week

It's been a lot of fun for little man, running around the house and pretending to be a tiger!

The Berry Bunch: Tiger Tail Tutorial: GYCT Design's Make Believe Week

The Berry Bunch: Tiger Tail Tutorial: GYCT Design's Make Believe Week

The Berry Bunch: Tiger Tail Tutorial: GYCT Design's Make Believe Week

I decided to make up a tutorial for the tail so you can make one for yourself!

Tiger Tail Tutorial

The Berry Bunch: Tiger Tail Tutorial: GYCT Design's Make Believe Weekwhat you need:
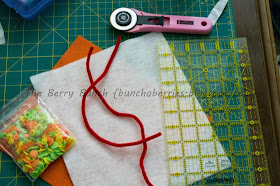
Rotary cutter
2 sheets of felt (I just got the paper sized pieces from my local Joann's store) 1 orange 1 white
1-2 pipe cleaners
1 snap set
poly-fil


The Berry Bunch: Tiger Tail Tutorial: GYCT Design's Make Believe Week


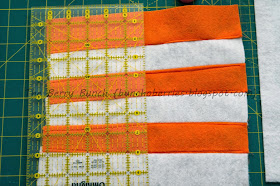
Cut strips off your length of your sheets of felt, 3 each color. In my case, because I had used an inche, I cut 2" by 10".


The Berry Bunch: Tiger Tail Tutorial: GYCT Design's Make Believe Week


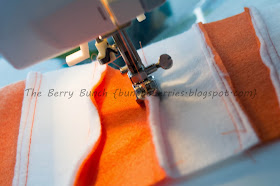
Sew the strips together, alternating in color. I used a 1/4" seam allowance here. Top stitch seam allowance down.

The Berry Bunch: Tiger Tail Tutorial: GYCT Design's Make Believe Week

The Berry Bunch: Tiger Tail Tutorial: GYCT Design's Make Believe Week


Cut the panel in half across the strips. In my case it was 5".


The Berry Bunch: Tiger Tail Tutorial: GYCT Design's Make Believe Week


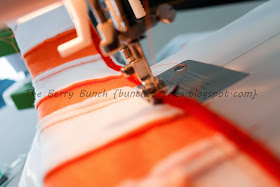
Sew the two panels together making sure to follow the alternating pattern. Top stitch seam allowance down.

The Berry Bunch: Tiger Tail Tutorial: GYCT Design's Make Believe Week

The Berry Bunch: Tiger Tail Tutorial: GYCT Design's Make Believe Week


Fold in half, mark seam allowance (3/8"), and using a curved piece (a camera lens cap worked perfectly), mark the end of the tail following from the seam allowance of one side to the fold on the other.  As you can see, I accidentally forgot the seam allowance. That is somewhat important. :)


The Berry Bunch: Tiger Tail Tutorial: GYCT Design's Make Believe Week

The Berry Bunch: Tiger Tail Tutorial: GYCT Design's Make Believe Week


Sew down the length of the tail, following your traced curved line and backstitching at the fold to secure. be sure you leave the top open!

The Berry Bunch: Tiger Tail Tutorial: GYCT Design's Make Believe Week

The Berry Bunch: Tiger Tail Tutorial: GYCT Design's Make Believe Week

The Berry Bunch: Tiger Tail Tutorial: GYCT Design's Make Believe WeekTrim the excess corners at the end. 


The Berry Bunch: Tiger Tail Tutorial: GYCT Design's Make Believe Week


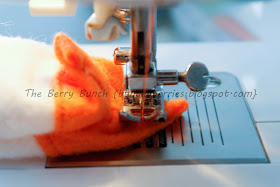
Taking your pipe cleaners, fold in the ends so not to poke through, and zig-zag stitch them down on the seam allowance from the end of the curve to the last inch of the tail. Backstitch the ends of the pipe cleaners a couple times


The Berry Bunch: Tiger Tail Tutorial: GYCT Design's Make Believe Week


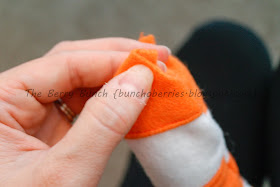
turn the tail right-side out


The Berry Bunch: Tiger Tail Tutorial: GYCT Design's Make Believe Week


Lightly stuff with poly-fill. Too much wont lend to the pliability of the pipe cleaners.


The Berry Bunch: Tiger Tail Tutorial: GYCT Design's Make Believe Week


Stitch the opening closed 3/8" 


The Berry Bunch: Tiger Tail Tutorial: GYCT Design's Make Believe Week


fold the seam allowance down and pinch the ends baste 1/2" down.


The Berry Bunch: Tiger Tail Tutorial: GYCT Design's Make Believe Week

The Berry Bunch: Tiger Tail Tutorial: GYCT Design's Make Believe Week

The Berry Bunch: Tiger Tail Tutorial: GYCT Design's Make Believe Week

The Berry Bunch: Tiger Tail Tutorial: GYCT Design's Make Believe Week


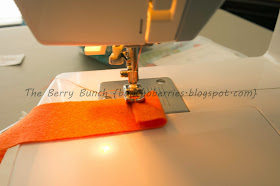
Time for the snap, or velcro, pieces: Cut 2 strips, 2" x 1.5". This image is the finished tab. 


The Berry Bunch: Tiger Tail Tutorial: GYCT Design's Make Believe Week


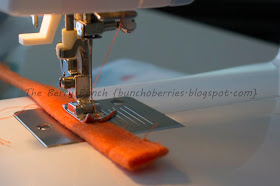
Fold one end down by 1/2" and stitch in place,


The Berry Bunch: Tiger Tail Tutorial: GYCT Design's Make Believe Week


fold in half long way and stitch down the edge. repeat for the other snap tab


The Berry Bunch: Tiger Tail Tutorial: GYCT Design's Make Believe Week


place the non folded edge on the triangle lining up with the basting stitches.


The Berry Bunch: Tiger Tail Tutorial: GYCT Design's Make Believe Week


Stitch in place. I stitched along the triangle to secure it down. 


Repeat with the other snap tab.

The Berry Bunch: Tiger Tail Tutorial: GYCT Design's Make Believe Week


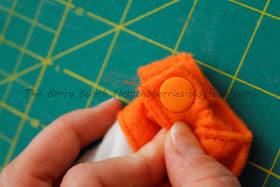
Apply snap according to manufacturers directions. Make sure that you have the snaps facing the correct way! I may or may not have had to re-apply the snap once, or twice...


And, voila! A Tiger Tail you can attach to a belt or belt loop!

The Berry Bunch: Tiger Tail Tutorial: GYCT Design's Make Believe Week

The Berry Bunch: Tiger Tail Tutorial: GYCT Design's Make Believe Week

Happy sewing, and make believing! :)

The Berry Bunch: Tiger Tail Tutorial: GYCT Design's Make Believe Week