Pages

Monday, December 29, 2014

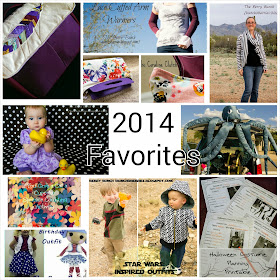
2014 Favorites

Berry Bunch 2014 Favorites
It has been a crazy year! I made a resolution that iwas going to do more this year and I started off fairly strong. But, sometimes life happens and I needed to focus on family; they needed me. Even though, I think it has been a pretty good year, and I think you, readers, for making it as great as it's been!

I thought it might be fun to jump on and do a review of the year. See what you, readers, visited the most. And also share with you my favorites. It was really hard to pick. I loved how so much of what was done this year turned out!

My favorites

Your favorites

The one that had the least views, probably because I didn't promote it as much. Hmm... A lesson learned perhaps? 

I have met do many great blogging people this year. They have pushed my sewing ability, to get me to do more. I've met some incredible pattern designers that have given me athe great opportunity to test the patterns. They are all great people. I'm so glad I've gotten to meet them!

One thing I have noticed is I've spent a whole lot of less time on Pinterest. It's hard when friends ask if I've seen stuff, I laugh because I'm just not on it. I also have less time to sew and work on things with baby girl taking one nap a day and little man not taking any. It makes it harder to write up posts, edit writing, take pictures, edit pictures, etc. It's a lot of work, and it's hard to do with so little time!

It's been fun learning and growing, and thank you for coming along for the ride. I look forward to a New Year!

Happy New Year!

Friday, December 19, 2014

Be Brave Ribbon Necklace: Etsy Shop Opened


I made this necklace for my secret sister. I loved it and wanted one for myself. But, instead I'm sharing it with you!

I opened an etsy shop called BunchOBerriesDesigns so I could sell these necklaces and am thinking of listing bags too, but one step at a time.


I found these incredible metal stamps ImpressArt Uppercase Stamp Set, 3mm, Bridgette (affiliate link), and I love the font. I also got the numbers too. ImpressArt Number Stamp Set, 3mm, Bridgette (affiliate link)...

I love how it turned out, and my secret sister said she loves it too. I've already seen her wear it twice! Makes me happy that she enjoys it!

So check it out, heart it to spread the word, share it with friends who might like it, order one for yourself.

https://www.etsy.com/listing/214159394/be-brave-hand-stamped-metal-washer?

Tell me... What do you think?

Tuesday, December 9, 2014

GYCT Designs Holly & Ivy Party Dress


Have you seen the Holly & Ivy Party Dress by GYCT Designs (affiliate)? I love this dress on baby girl. I live that it's easy to sew, fast, and has so many different options! Perfect for play, perfect for dressing up. It's just an awesome dress!


The dress has three neck lines;  sweetheart, square and round. It has two sleeve options; long and short with elastic. The dress also gives directions for doing an overlay!


I did a regular one for baby girl in a square neck for Thanksgiving and an overlay with a sweetheart neck for her Christmas dress. Both turned out so cute! I capped the sleeve for the Christmas one, lined it and sewed it onto the bodice before doing the lining... That way all those bodice seams are hidden.


Check out the dress, such an easy sew. Adorable! Holly & Ivy Party Dress by GYCT Designs (affiliate)

Perfect for pictures with Santa!


Happy sewing!

Wednesday, December 3, 2014

Arizona Mug Rug: A Paper Piecing Tutorial

You've probably seen my Arizona Mug Rug here and here, and you can buy the paper piecing pattern on craftsy. Here I'm giving directions on how to assemble paper piecing patterns using my Arizona Flag Mug Rug.

Print patterns according to directions, in this case without any scaling. Make sure the 1" test box is 1". I print them on paper that works really for paper piecing, this is it from Amazon! Love this stuff! Foundation Piecing Paper (affiliate)

Cut out all pieces.


Then I take and fold on the lines... This makes trimming the fabric once sewed, and matching the fabric piece to the space a little easier too.


Match up the size of fabric to the space starting with the numbered 1 space. I think of it like a quilt-by-number as-you-go method, but on paper instead of batting.


Make sure you leave enough room for seam allowance.

I use a spot of glue, like this glue Elmer's Disappearing Purple School Glue Sticks (affiliate), to hold down the first piece of fabric as I start. wrong side of the fabric to the back of the paper.


Then take your 2nd piece of fabric (making sure it's big enough) and line it up on top of your first piece, right sides together. using a short stitch length, sew along the line of the paper fabric down so you could see the lines.

Lining up D+C...

Open up your fabric and it should cover the second space plus seam allowance. Trim down for the next piece leaving a 1/4" - 1/2" seam allowance.


Continue for each piece and shape and then trim down to the final paper size and shape.


then sew together as instructed by pattern. In this case:

Bottom parts A + B, then tear away paper

Top first E+F & D+C then EF + DC .. tear away paper 

Last top + bottom

I pinned to make sure the star came out.


Square it off, sandwich with batting and backing then quilt and bind!


You now have a fun new rug mug for your morning coffee or tea!

Don't forget to give this a try using my pattern that you can buy on craftsy !

Happy sewing!

Sunday, November 30, 2014

Arizona Mug Rug: A Berry Bunch Pattern

remember when I first made the Mug rug? You can read the post about it here


It is now for sale on Craftsy!

Arizona State Flag Paper Pieced Mug Rug

Stay tuned for a little help with paper piecing!


Happy sewing,

Monday, November 24, 2014

A Bag for MOPs: Dorian Messenger: Swoon Sewing Patterns {Pattern Review}

*This post contains affiliate links. I receive a small commission only if you make a purchase at no extra cost to you. All views expressed are my own.*

I signed up volunteered to be a Discussion Group Leader for my local MOPs group.


Wait.. Me? I volunteered for leadership?

Ha! Yes. I did. And I needed something to carry around my DGL binder, small notebook, planner, wallet, keys and a water bottle (lets face it, that is a necessity in the desert). Totally the crafty mentality, right?


Anyway. It needed to be perfect and fit the theme, because I am a dork that way. The theme for this year is Be You Bravely and the logo is a feather. The feather symbolizes the bravery, courage and hope that come with motherhood. I love it. I love the feather, love the logo; love it.

Of course, I needed to play up the feather and found this awesome Feather Paper Pieced Pattern from Shape Moth and thought it looked awesome!


I asked the question to some of the fabulous ladies in some of the sewing groups online and they suggested the Dorian Messenger by Swoon Sewing Patterns (affiliate link). I thought it was perfect to display at least one of the feathers from Shape Moth. And, it was! I love the hodge podge of fabrics bravely placed together to create this messenger bag to use for MOPs meetings. :)


Look at that space. Gotta love my use of scrap fabric choices... Lol....


Two pockets in front, another set inside and a zipper in the back make it perfect. You can customize with extra pockets on the inside easily by adding another pocket panel and I almost added a zipper to the flap. It gives directions for 3 different closure options. I used magnetic snaps.

The only thing it needs now is the strap! How I'm going to attach it, no idea...


The directions are clear, easy to follow. I really enjoy her patterns. Swoon Sewing Patterns (affiliate link) always turn out awesome.

Happy Sewing!

Tuesday, November 18, 2014

Pencil Zipper Pouch by Horris & Deedle for One Thimble

Happy 1st year anniversary to the e-zine One Thimble! And there 5th edition!


I have to say, I have not gotten a subscription yet. Though it is on my wish list! So much stuff in one magazine! And the patterns? Amazing patterns! 


I had to jump at the chance to share a pattern with you. There are so many great patterns, especially to use as gifts, it was hard to pick. So I decided to go with the pencil case. 


So simple and easy! Combining my first sewing love, quilting, with the fun zipper pouch. What's not to enjoy? 


Plus? It's given me some more ideas for zipper pouches. :) Christmas gifts, here we come! Lol...


Check out these other awesome blogs participating in the tour.


Saturday 11/15: Handmade Boy
Sunday 11/16: Mimi's MomRebekah Sews
Wednesday 11/19: Made by SaraBee Quilted Beauties

And there is a giveaway!

a Rafflecopter giveaway

My son keeps asking if the zipper pouch is his. Ha! Guess it's time to make some more...


Happy sewing!

Tuesday, November 4, 2014

Happy Halloween: Batman Theme Costumes: Batman

On Sunday I shared with you our theme we used for Halloween. Batman!

The Berry Bunch: Happy Halloween: Batman Theme Costumes: Batman


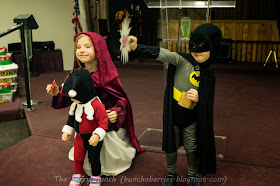
Here is little man's costume... Batman

The Berry Bunch: Happy Halloween: Batman Theme Costumes: Batman

My inspiration was the Adam West batman. But instead of blue, I used black as that was something I already had at home.

Body


The Berry Bunch: Happy Halloween: Batman Theme Costumes: Batman

Pattern Used: Peek-A-Boo Pattern Shop's Lullaby Body Suit (affiliate link) size 3T

Modifications: I color blocked the bodysuit in gray, yellow and black.

Embellishments:  I appliqued the yellow circle for the logo and the gold fabric for the belt. The bat logo was stenciled using freezer paper stenciling.

The Berry Bunch: Happy Halloween: Batman Theme Costumes: Batman

Leggings

Pattern Used: Titchy Threads Fancy Pants Leggings 3T length and 2T width

Hood, cape and cuffs


The Berry Bunch: Happy Halloween: Batman Theme Costumes: Batman

Self drafted

I used a stabilizer for the bat ears on the hood. Used a button with loop for the cape. The spikes on Batman's cuffs are made using felt.

The Berry Bunch: Happy Halloween: Batman Theme Costumes: Batman

BAM sign

One thing that little man said he wanted was a BAM sign so her can defeat the bad guys. the shape was cut out of a cereal box, and a strip for the back to make a handle. spray paint your background on one side only. Permanent marker for the lettering. Super fun, easy and quick. Little man was thrilled!

The Berry Bunch: Happy Halloween: Batman Theme Costumes: Batman

I am pretty satisfied with the outcome. :)

The Berry Bunch: Happy Halloween: Batman Theme Costumes: Batman

Check out our other costumes this last Halloween.. Here

Connect with me:
Follow Me on Pinterest facebook Follow on Bloglovin Instagram google+ twitter email me

Happy Sewing!